Glowforge Lid Graphics
Design sleek lid graphics and color strategies for two laser printers.
My Role
Industrial Design; Graphic Design; 3D Design.
Tools
Paper and pen, Illustrator, Photoshop, Keyshot, Alias, Solidworks.
Timeline
Three Months
Introduction
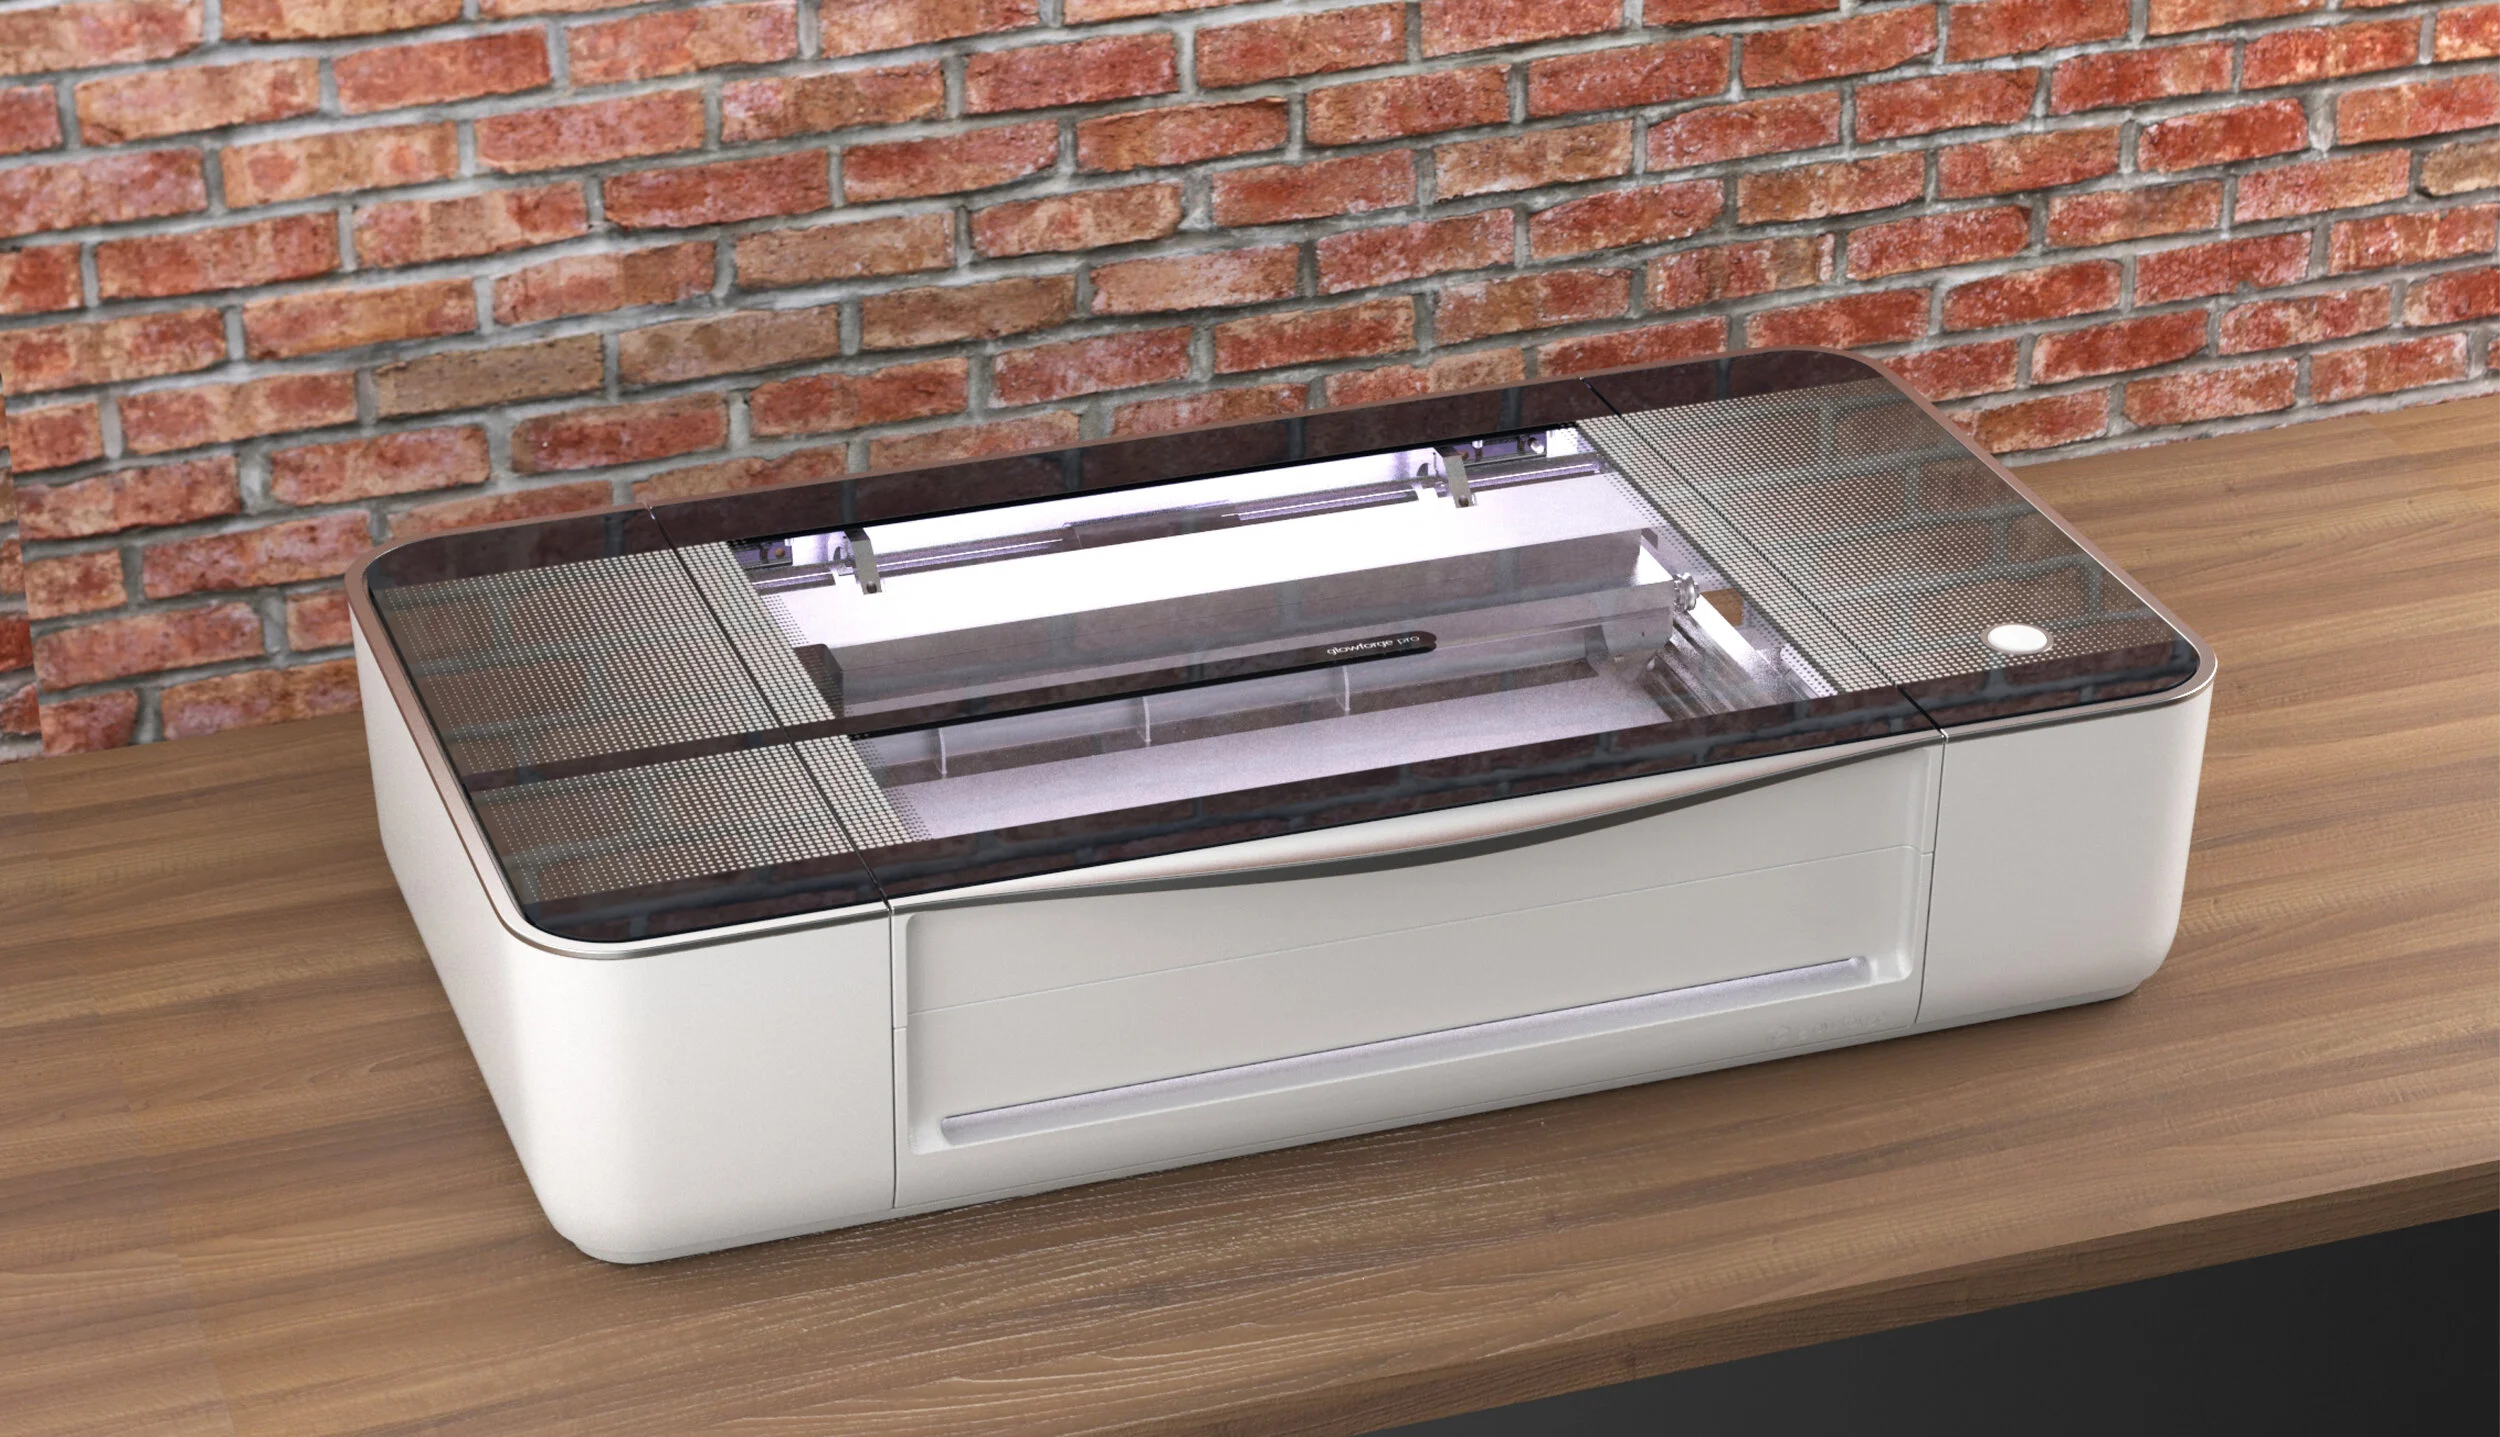
Glowforge, the 3D laser printer company, turned to us for new graphic design on the lid of the Glowforge Pro laser printer and the Glowforge Basic laser printer. The new lid graphic should bring a refreshed and sophisticated look to the two products, help hide the mechanical structure under the lid, and make it easy for users to observe the laser printing process.
I worked with another designer at deap design to develop new lid graphics and color strategy for Glowforge Pro and Glowforge Basic. Each graphic started with hand drawn sketches, then digitally brought to life in Illustrator. I also communicated with Glowforge CTO and engineers in regard of design iterations and constraints, as well as deliver graphic documents for production.
The Challenges and Solutions
The Challenges
Glowforge, the 3D laser printer company, turned to us for new graphic design on the lid of the Glowforge Pro laser printer (advanced setting, higher price point) and the Glowforge Basic laser printer (basic setting, standard price point).
The new lid graphic should:
Give the two products a refreshed and sophisticated look;
Hide the mechanical structure under the lid;
Make it easy for users to observe the laser printing process.
The Solutions
I worked with another designer, engineers and client to develop new lid graphics and color strategy for Glowforge Pro and Glowforge Basic.
Utilized clean, versatile pattern and elegant colors to bring a refreshed and sophisticated look.
Integrated camera band design into the graphics to hide the camera and its wire located under the center of the lid. Applied solid colors to the graphic to hide the mechanical structure underneath.
The graphic fades away toward the center of the lid, allowing users to look through the center of the glass and appreciate the laser printing process.

The process

Design Brief
Understand client expectations and align project goals.
Glowforge is a Seattle-based 3D laser printer company. Glowforge makes desktop laser printer that cut, engrave, and create beautiful and amazing products with a push of a button.
Glowforge turned to Deap design, looking for new graphic design on the lid of the Glowforge Pro laser printer (advanced setting, higher price point) and the Glowforge Basic laser printer (basic setting, standard price point).
After communicating with client, we interpreted client’s requirements into the following project goals:
A refreshed and sophisticated look. The lid graphic design should give the two products a refreshed and sophisticated look, distinguish them from each other, but make them look like they belong to the same product family.
Hide the mechanical structure. Hide the mechanical structure in the left and right side of the laser printer to keep an elegant appearance. Hide the camera and its wire located under the center of the lid for a cleaner look.
Make it easy for users to observe the laser printing process. Allow users to look through the center of the lid glass to appreciate the laser printing process.
Design Stories; Inspirations
Define the product strategy and style directions.
After aligning project goals with our client, we started the design process by defining graphic style directions based on the stories behind the Glowforge Pro and the Glowforge Basic.
The Glowforge Pro laser printer:
Product story: The Pro has the most powerful feature settings and a higher price point. It is a futuristic piece of machinery but yet is still something familiar.
Style strategy and directions: We took inspiration from geometries with fast and crisp lines; dark and powerful colors. We reviewed forms with futuristic and sophisticated style, but is still familiar to people as something they can use every day.
The Glowforge Basic laser printer:
Product story: The Basic has standard settings and price point. Although not as edgy as the Pro, it is a reliable, beautiful, and smart tabletop object.
Style strategy and directions: We played with calm color themes and clean, simple geometries to give it more human touch.

Ideation; Sketching; Lo-fi Pattern
Explore patterns based on the style strategy.
At the beginning of the ideation process, we focused on the pattern itself without any color strategy involved. The “lo-fi” pattern exploration helps us stay concentrated on designing pattern forms that bring refreshed look on both products.
With both models in mind, we played with dots, lines, various forms and different line weights. We started by quick hand sketching of a small portion of the pattern, then narrowed down to four pattern directions to bring to Illustrator for detailed design.

Ideation; Color Strategy; Digital Drawing; Hi-fi Pattern
Explore colors and further graphic details.
We put the four pattern directions into full scale to look at proportion, further details and various color strategy.

The Final Implementation
The final design direction was decided based on user needs and production requirements.
The final design direction gives the Pro and the Basic model a refreshed look. The new lid graphics distinguish the two models from each other, but still connects them in the Glowforge product family.
Pattern: The fading dots pattern was chosen by us and the client because of its simple and versatile look. It brings a smart feeling and yet a sense of familiar to users. For production, it is also the easiest for the glass vender to print on the lid.
Color: The color swatch are made of sophisticated neutral colors to fit well in various interior style at people’s home. The bold and dark colors in the Pro model convey a sense of power, edgy and formality. The ivory in the Basic model lends a clean, calm and soft human touch.
Ink in different shades of gray are also easier for manufacturer to print, thus help us save time and cost in production.

Prototyping; Testing; Iterations
Work with client and glass vendor (engineers) to create prototype, overcome technical constraints and deliver design documents for production.
We sent the chosen graphics to the glass vendor for prototyping. After receiving the lid prototypes, we noticed rooms of improvement and received feedbacks of technical constraints from the glass vendor.

Lid prototypes.
We worked with the client and engineer team to overcome the technical difficulties before delivering design documents for production:
❗️Constraint One: Ink bleed over the edge of the glass when printing the graphics, leaving dirty marks on the side of the lid.
💡Our Solution: We reduced the graphic by 0.01 inch from the edge of the glass to avoid bleeding.
❗️Constraint Two: The glass vendor was not able to print gradient colors.
💡Our Solution: We achieved the gradient effect with solid colors, by putting a layer of dots from small to big onto a solid color background.
❗️Constraint Three: Facilitate a simple and cost effective graphic printing process under a tight timeline.
💡Our Solution: We seperated the graphics into the fewest layers (printing steps) and reduced colors variety to simplify the printing process and be cost effective.

Deliverables for production after iterations.
Impact
The outcome 🎉
🌸“A sleek and efficient design makes this industrial-grade technology beautiful and affordable.” - BUSINESS WIRE
🏆The Best 3D Printers of 2019, Forbes
⭐️By 2019, Glowforge has shipped tens of thousands of printers and customers have printed more than 5 million items.
🙌🏼In June 2019, Glowforge announced a partnership with WeWork to install 3D printers at co-working locations in Seattle, San Francisco, Houston, New York, and London.


Learnings and Insights
Translate brand story to design opportunities that serve users. The design brief from client was mainly focused on the products, but as designers, we always keep the user’s needs in mind. By asking “Why do we design the graphic like this?” and “How will the feature benefit our user?”, we made sure our design create a wonderful laser printing experience for users while telling the brand story.
Work closely with the client and engineer team to overcome technical difficulties and design for production. For a physical product, designers usually don’t get to iterate the design after it went into mass production, thus discovering potential flaws and understanding technical constraints is critical during the design process. Testing full scale prototypes and communicating production details with engineers helped us efficiently evaluate our design and overcome the constraints to save time and money.

Next steps
With the constant growing of the Glowforge product line, I look forward to designing user experience for more future Glowforge products.